


Carl's Place Built-In Golf Room Kit
Carl's Place Built-In Golf Room Kit elevates your golf simulator experience to a new level by providing a fully immersive and permanent setup in the dedicated space of your choosing. Choose from four finishing styles to turn any residential or commercial space into a golf simulator haven. Designed for seamless integration, the kit allows your turf to seamlessly lead up to the impact screen, creating a visually uninterrupted experience.
Ordering Instructions:
- Contact us to request a Made-to-Measure Quote

Seamlessly Incorporated into Your Space
Once in place, your golf simulator becomes an integral part of your room's layout. Its built-in design offers a permanent solution, seamlessly blending into the room's aesthetic. Not only does this enhance the overall appeal of your property, but it also adds value by offering a distinctive feature that sets your space apart.
Maximize Your Room's Potential
A built-in golf simulator optimizes your room's layout, providing ample space for unrestricted swinging and maneuvering.
Enhanced Realism
A built-in golf simulator offers unparalleled realism and immersion, providing the most authentic indoor golf experience available.
Versatile Functionality
Enhance your built-in golf simulator with quality speakers or surround sound and comfortable recliners, transforming it into a fully-fledged home theater experience.
Features
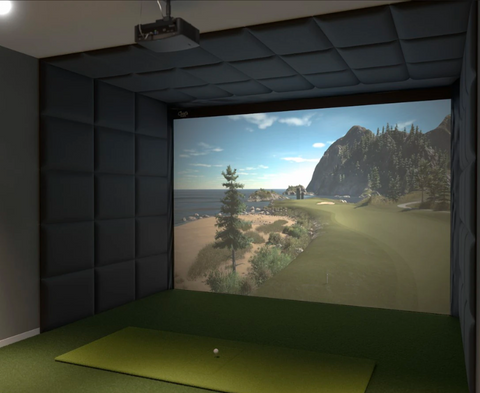
Crafted by Carl to Achieve a High-End "Built-In" Aesthetic
Carl’s Built-In Golf Room Kit empowers both residential and commercial users to effortlessly convert virtually any room into a luxurious golf simulator haven. Designed for seamless integration, the kit allows your turf to seamlessly lead up to the impact screen, creating a visually uninterrupted experience.
The Built-In Screen Kit includes the impact screen, mounting hardware, and required starter panels. Padded wall and ceiling panels or curtains depend on the selected finishing style and your made-to-measure quote.
Ideal for individuals with carpentry or handyman skills, the Carl's Built-In Golf Room Kit is meticulously designed for rooms with straight, uniform 2x4 wood framed walls free of trim boards. Utilizing plywood on walls and ceilings can streamline installation. However, if your space differs from these specifications, customization may be required to adapt the setup to your unique environment.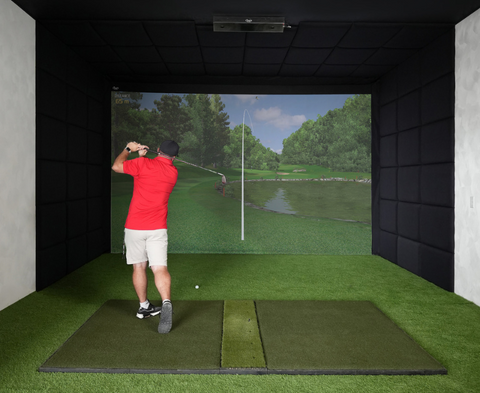
A Golf Impact Screen Designed for the Perfect Fit
Carl’s Built-In Screen seamlessly integrates into your space without the need for any additional pipes. Alongside the impact screen, the kit includes corner cable anchors, pulley wheels, top and bottom cables, snaphooks, cable locks, zip ties, hook-and-loop straps, detached flaps, and starter panels. Starter panels are included with every Built-In Screen configuration, including screen-only setups, and cannot be removed from the kit.
The current installation uses zip ties at the screen corners and hook-and-loop straps along the top and sides to attach the screen to its cables. Adjust the straps and cable tension as directed in the current manual, then secure the detached flaps to the wall and ceiling starter panels.
Crafted with precision at Carl's Place headquarters in Milton, Wisconsin, USA, by seasoned professionals in the golf simulator industry, Carl’s screens are built to withstand the test of time.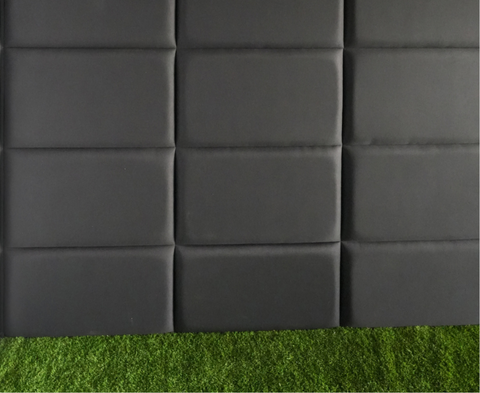
Enhance Your Golf Simulator Space with Carl's Panels
Carl's Golf Room Panels provide a distinctive solution by dimming and softening your walls and ceiling, effectively acting as your enclosure. Easily attached using French cleats and Z clips, these panels safeguard your walls and/or ceiling from errant shots.
Crafted with an inner core and foam padding, encased in fabric on both the back of the board and the front of the foam, these panels are custom-sized to fit your unique space and are approximately 2" - 2.5" thick. Not only are they heavy-duty, ensuring you can swing with confidence, but they also offer peace of mind against wall damage.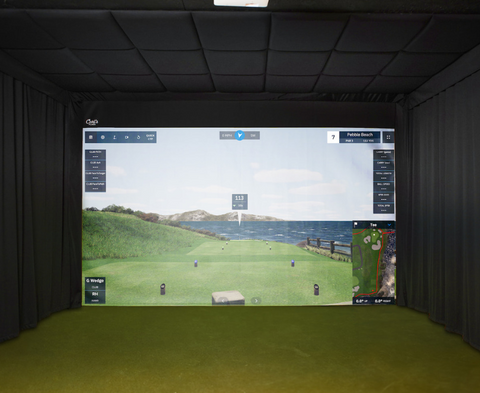
Pair the Built-In Golf Room Kit with Carl’s Golf Room Curtains
Carl’s Golf Room Curtain offers a versatile solution for temporarily covering doors or windows, providing an excellent alternative to traditional enclosure walls. Easily pulled out for play and retracted for access, it offers convenience and flexibility.
In commercial settings, these curtains effectively partition bays, creating private spaces where players can concentrate on their swings and fully immerse themselves in the golfing experience. The fabric efficiently blocks ambient light, ensuring a truly immersive indoor golf experience. Plus, its sleek design ensures it looks great from both the front and back, lending a professional aesthetic to any installation.
Requirements
Installing Your Built-In Golf Room Kit Step-by-Step
1. Prepare and Measure: Review the current assembly manual and align the installation.
2. Install Hardware: Install the corner cable anchors, required starter panels, and ceiling snaphooks.
3. Mount the Screen: Install the cables and screen, using corner zip ties and hook-and-loop straps as shown in the manual. Adjust tension and spacing.
4. Secure the Flaps: Attach the detached screen flaps to the wall and ceiling starter panels.
5. Add Protection: Install the selected wall and ceiling protection, such as padded panels or curtains, following their instructions.
6. Final Check: Review the completed installation and safety guidance in the current manual before use.
Ideal Space Requirements
For optimal performance, ensure your space accommodates full swings. We recommend a standing distance of at least 10 feet from the screen, with 7 feet of swing clearance in all directions.
- Minimum Room Depth: 18 feet (includes 1-foot buffer space behind the screen, 10 feet from screen to tee, and 7 feet behind the tee)
- Minimum Room Width: 14 feet for tee-centered setup
- Minimum Room Height: A minimum of 9 feet is recommended for unrestricted swinging.
- Maximum Room Height: 11'. Must be able to frame out a shorter ceiling if ceilings are taller than 11'.
*If you plan on using an overhead launch monitor, most require the launch monitor to be positioned 9-10 feet in height from the turf to the launch monitor sensor.
Ideal for Installers Skilled in Construction/Trades
To achieve the built-in golf room look, you must:
- Have a space where a golf impact screen can be installed on an even plane, 1' away from the wall behind it.
- Be confident using laser levels to align all components.
- Be able to demo any trim boards that interfere with screen or panel placement.
- Anchor lag screws into the top and bottom plate of your walls.
- Have patience to tension and adjust your screen for a perfect fit.
- For the wall and ceiling panels, you must use a diagram we provide to visualize and lay out the panel placement.
- Attach cleats to studs in your walls, or use drywall anchors, then hang each individual panel until you cover the space.
To properly install this golf room kit, you must have the patience and technical aptitude to achieve all of the above. If any of this sounds out of your league, shop our indoor golf collection.
Technical Specifications
Starter panels are required for every Built-In Screen setup. Additional padded wall and ceiling panels or curtains are optional finishing choices. The screen-only configuration still includes starter panels.
However, please note that additional components such as the hitting surface, launch monitor, projector, and electronic device for running the system are required and not included with the kit.
Assembly
Required Tools for Built-In Screen Assembly:
- Levels (laser level or plumb line)
- Ladder(s)
- Drill and driver
- Drill bits
- 10mm socket wrench
- Tape measure
Required Tools for For Built-In Wall Panels Assembly:
- Levels (laser level and 3ft level)
- Ladder(s)
- Tweezers or hook and pick set
- Pencil
- Drill/driver
- Studfinder
- Drywall anchors
- Measuring tape
Resources
Documents:
30-Day Returns
We want you to be completely satisfied with your purchases. If something isn’t quite right, you can return your items within 30 days of delivery. For more details visit our return and refund policy page.